
Then you walk out with a plate of fresh hamburgers. The grill is on fire. But what about the counter space? Nonexistent. You place your condiments on a shaky side table. The sun hits hard. No shade, no sink nearby, and no prep zone that keeps you connected to the cooking flow. That’s where most outdoor kitchens fail—not in appliances, but in planning.
A well-designed outdoor kitchen fixes all of that. It creates workflow, adds durable storage, and turns cooking into part of the gathering instead of something you disappear from. Whether you’re starting fresh or upgrading an old patio, layout, surfaces, and utilities decide success long before the grill ever arrives.
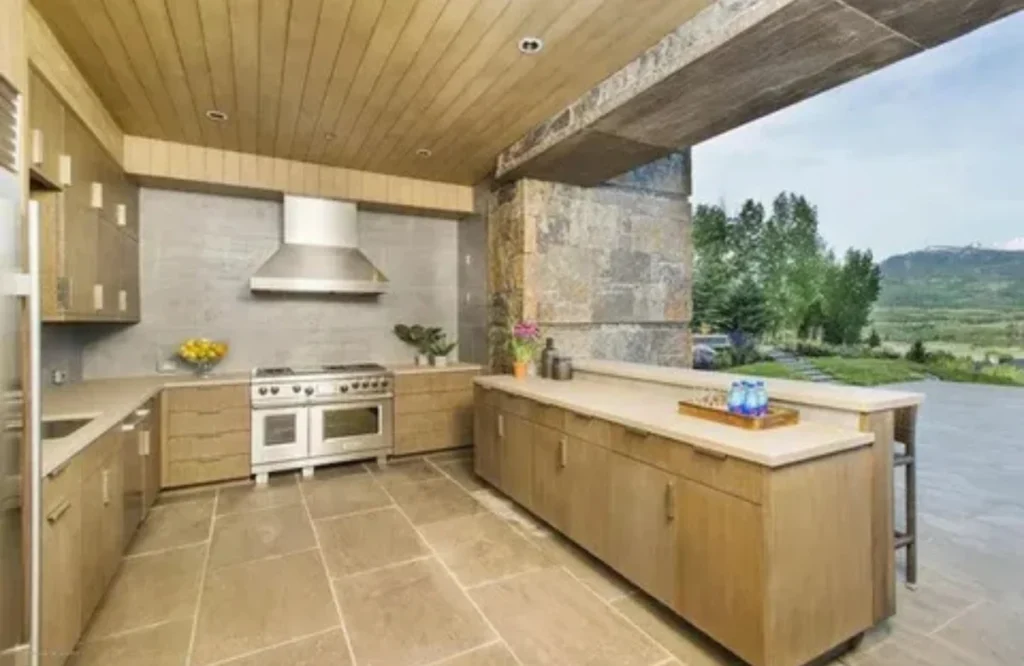
Start With the Right Outdoor Kitchen Layout
Think Zones, Not Just Appliances
A strong outdoor kitchen layout starts with zones, not equipment. You need three working areas: hot (grill, smoker), cold (fridge, ice storage), and wet (sink and prep). When these are placed within a few steps of each other, movement becomes natural instead of chaotic.
L-shape and U-shape layouts work best because they form a clear workflow triangle. They also give enough counter space for prepping, serving, and staging food without crowding the cook.
Account for Traffic and Wind
Grill placement matters more than people expect. Smoke direction should move away from seating, not into it. Wind patterns in Arlington should influence final positioning, especially in open yards.
Leave at least 36 inches of clearance around cooking areas for safety and cleaning. If entertaining is a priority, a bar-height counter creates separation while still keeping guests part of the experience.
Plan for Utilities Early
This is where most outdoor kitchen builds go wrong. Gas, water, and electricity should be mapped before any concrete is poured. Once the base is set, changes become expensive and limited.
Gas line routing, drainage planning, and electrical load calculations all need professional input. Appliances like refrigerators, ice makers, and lighting systems require stable power and proper circuit planning.
Choose Outdoor Kitchen Countertops That Survive Texas Summers
Material Selection Makes or Breaks the Space
Countertops in outdoor kitchen design face conditions indoor kitchens never see. UV exposure, heat cycles, moisture, and stains all matter.
Granite and soapstone handle sun well but need sealing. Concrete offers flexibility in design but requires maintenance to prevent staining. Quartz may look good initially, but prolonged heat exposure can damage its resin structure over time.
Tile and Porcelain Worth Considering
Large-format porcelain slabs are becoming a strong choice for outdoor kitchens. They resist fading, heat, and moisture while being easy to clean.
Tile can be budget-friendly, but grout lines must be sealed properly or they will stain and crack over time. Drainage slope is essential regardless of material to avoid standing water after storms.
Edge Profiles and Overhangs
A functional overhang matters as much as appearance. A 1.5-inch overhang allows comfortable seating at bar areas. Rounded or eased edges reduce chipping and feel more modern.
If heavy appliances like pizza ovens are part of the plan, countertop strength and reinforcement should be designed from the start.
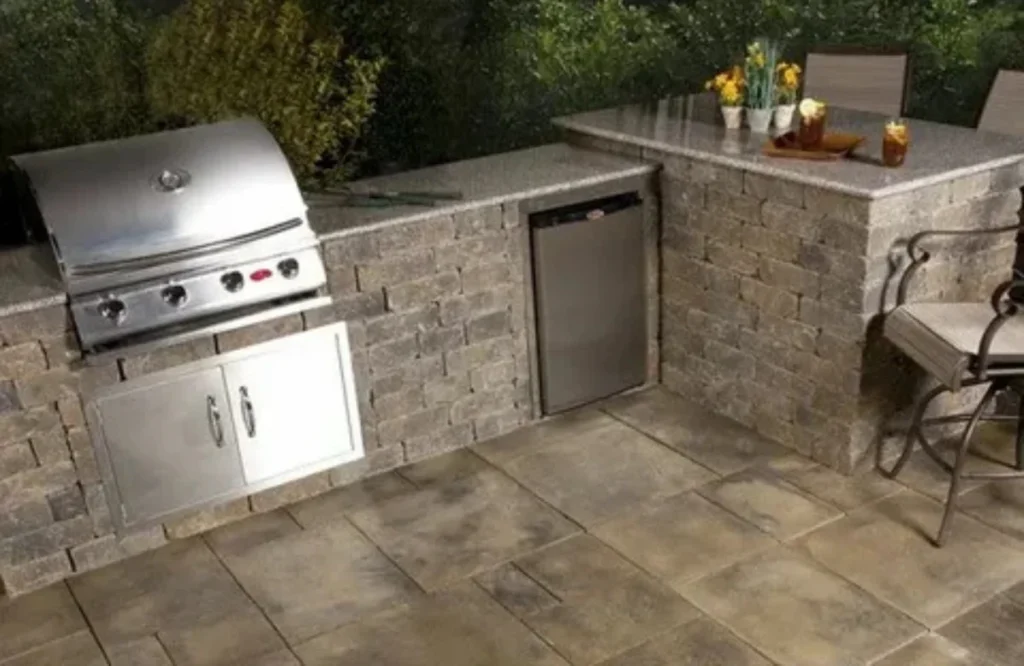
Build With Weather-Resistant Cabinetry and Smart Storage
Skip the Indoor Leftovers
Indoor cabinets cannot survive outdoor conditions. Heat, humidity, and rain will warp them quickly.
Marine-grade polymer, sealed teak, or powder-coated aluminum cabinets last significantly longer and resist weather damage. These materials maintain structure and appearance even after years of Texas summers.
Modular Kitchen Configuration Flexibility
Modular outdoor kitchen systems allow phased upgrades. Start with a grill and refrigeration, then add sinks or warming drawers later.
This approach spreads cost and helps you understand how you actually use the space before committing to a full build. Integrated ventilation systems also help manage heat buildup around appliances.
Appliance Integration Planning
Every appliance has technical requirements. Built-in refrigerators need ventilation clearance. Ice makers require water and drainage lines. Warming drawers need dedicated electrical circuits.
Ignoring these details leads to overheating, inefficiency, or warranty issues. Proper planning ensures each component functions as intended.
Handle Drainage, Slope, and Foundation Like a Pro
Water Needs Somewhere to Go
Outdoor kitchens must be designed with drainage in mind from the beginning. A proper slope—about 1/8 inch per foot—prevents pooling around cooking and prep areas.
If a sink is included, wastewater should connect to approved drainage systems or dry wells, not surrounding soil or grass.
Foundation Stability in Clay Soil
Clay-heavy soil in Arlington shifts with moisture, which makes foundation choice critical. A floating slab or properly separated pier system prevents cracking and movement.
Separating the kitchen foundation from the home structure reduces long-term issues like misalignment, cracking, or drainage failure.
The DIY Outdoor Kitchen Reality Check
Know Your Limits
Simple modular setups can be DIY-friendly. However, gas lines, electrical wiring, and plumbing require licensed professionals and permits.
Cutting corners here can lead to safety risks, code violations, and expensive corrections later.
Budget for What You Cannot See
The visible part of an outdoor kitchen is only part of the cost. Utility installation, base preparation, and drainage systems often take up nearly half the budget.
Spending properly on infrastructure ensures the finished kitchen actually lasts instead of requiring rebuilds.
Ready to Build an Outdoor Kitchen That Actually Works?
A functional outdoor kitchen isn’t about luxury appliances—it’s about layout, durability, and proper utility design.
All Star Construction Group builds outdoor kitchens designed for real cooking, real weather, and real use in Arlington, TX. From gas and water planning to countertop installation and structural foundations, every step is handled with long-term performance in mind.
They also support full outdoor living upgrades including concrete work, patios, and integrated utility systems so the entire space functions as one connected environment instead of separate pieces.
Visit or contact All Star Construction Group to schedule a design consultation and turn your backyard into a usable cooking and gathering space built for Texas conditions.
FAQs
What is the average cost of an outdoor kitchen in Arlington, TX?
Most builds range from $8,000 for basic setups to over $35,000 for custom outdoor kitchens with full utilities, premium materials, and built-in appliances.
Do I need a permit for an outdoor kitchen?
Yes, if your project includes gas lines, electrical work, or plumbing connections. Arlington requires permits and inspections for permanent utility installations.
What countertop materials work best outdoors?
Granite, concrete, and porcelain slabs perform best in Texas heat. Standard quartz is less ideal due to UV sensitivity over time.
Can I build an outdoor kitchen on an existing patio?
Yes, if the slab is structurally sound and properly sloped. Some projects require reinforcement or extension before installation.
How long does installation take?
Modular builds can take 3–5 days, while custom outdoor kitchens with utilities typically take 2–4 weeks depending on permitting and inspections.