A brick patio adds charm, durability, and value to any outdoor space. Whether you’re hosting summer barbecues or enjoying quiet mornings, a red brick patio creates a classic and inviting atmosphere. Installing one might seem intimidating, but with the right guidance, it’s possible to create a stunning patio yourself.
This step-by-step tutorial will reveal to you how to plan, prepare and install a brick patio easily. You will find DIY methods of brick patio, as well as professional advice; you will learn how to install your patio fast without compromising and making it look good.
Why You Should Install a Brick Patio
Durability and Long-Lasting Appeal
- The bricks are durable and resistant to weather, thereby fitting outdoors.
- A brick and sand patio, unlike other materials, can be used for many decades under the proper care.
- The red brick patios are also ageing gracefully, giving them character with time.
Versatile Design Options
- You have the option of different designs, patterns, and layouts of the brick patio.
- Designs of the brick front patio or backyard can be tailored to the style of your home.
- The use of bricks can be combined with stone or concrete to make it more visually.
What You Need to Know Before Starting
Planning and Layout
- Measure your patio area and indicate the limits of your patio.
- Choose a pattern: the usual patterns are herringbone, basket weave and running bond.
- Take drainage into account to avoid pooling of water.
Materials and Tools
- Bricks: Red brick or of any desired kind.
- Sand: To fill up the holes.
- Paver base: Stability Stone or gravel.
- Tools: Rubber mallet, level, tape measure, plate compactor, broom and edging material.
Being equipped means you have a hassle-free brick-patio DIY project.
How to Install a Brick Patio
To install a brick patio, one should worry about the preparation, location, and finishing. Here’s a detailed guide:
1. Prepare the Site
- Clear the grass, rocks or debris.
- A typical patio is to be dug 6-8 inches in depth.
- The ground should be sloped in a way that allows buildings to be drained.
2. Install a Base Layer
- Apply crushed stone or gravel on the site evenly.
- Using a plate compactor, compact it to form a firm base.
- A sound foundation eliminates the chances of the brick and patio becoming dislodged with time.
3. Add Sand Layer
- Cover the compacted base with coarse sand 1 inch thick.
- Level it using a screed board.
- This layer gives an opportunity to lay a patio with brick easily and to make changes.
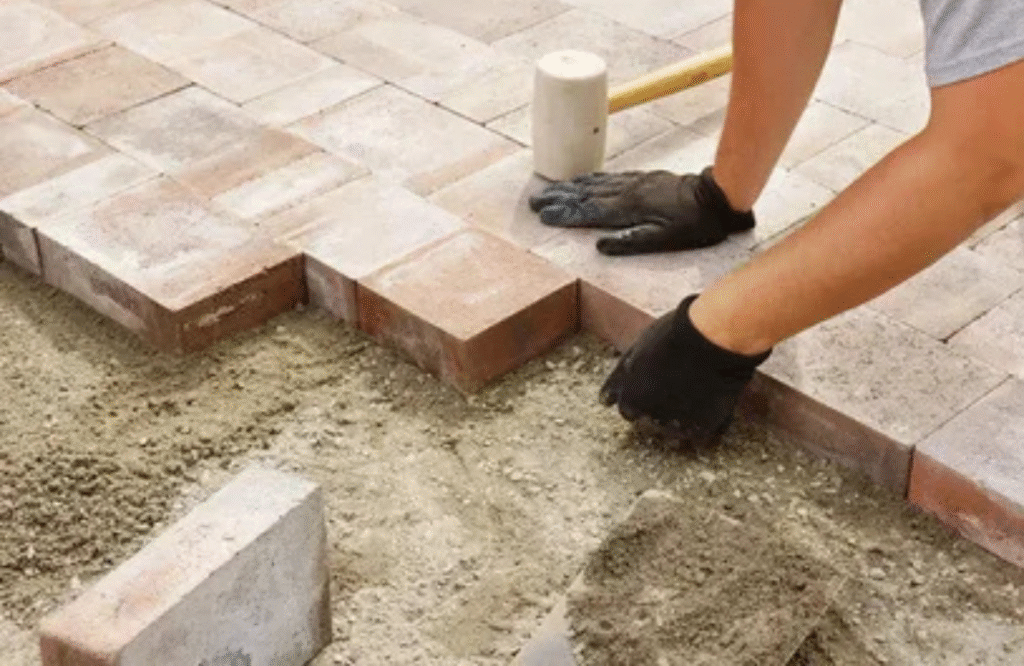
4. Lay the Bricks
- Begin at a straight or corner, and work outwards.
- Periodically place with the help of your selected designs of patio with a brick.
- Install the bricks by tapping them with a rubber mallet.
- Keep the sand filling of later the same way.
5. Cut Bricks as Needed
- Bricks: Use a masonry saw or a chisel to cut along the edges.
- Correct cutting will give out a clean and professional appearance.
- This is necessary in a brick front patio design or an odd space.
6. Install Edging
- Install a perimeter around the patio.
- This holds the bricks together and does not allow them to shift over time.
- Depending on your design, plastic, metal or wood edging would be effective.
7. Fill the Gaps
- Pour sand on the bricks and sweep away gaps.
- Bricks and sand are settled using a plate compactor to compact the surface.
- Continue filling until you have a stable brick and sand patio.
8. Water and Settle
- Spray water lightly to stabilise the sand more stable.
- Fills should be repeated to give the sand a tight and hard finish.
- Make sure the surface is smooth and the same.
9. Inspect and Adjust
- Look at the uneven bricks or loose bricks.
- Before the sand solidifies, adjust accordingly.
- Minor corrections are a way of avoiding problems in the future.
10. Enjoy Your Patio
- Your do-it-yourself brick patio is now ready to have furniture, plants, or entertainment.
- It is maintained in great condition through regular sweeping and re-sanding.
Benefits of Installing Your Own Brick Patio
1. Cost-Effective
- A DIY patio made of bricks is cheaper than using contractors.
- Purchasing materials in large quantities can also cut costs.
2. Customizable Designs
- Create a unique patio with bricks to match your style.
- Mix patterns, shapes, or colours for a personalised look.
3. Durable and Low Maintenance
- Bricks are weather-resistant and easy to clean.
- Simple maintenance like sweeping and occasional re-sanding, keeps the patio looking great.
4. Enhances Home Value
- A brick patio adds curb appeal and functional outdoor space.
- Potential buyers often value well-installed outdoor features.
Tips for a Fast and Smooth Installation
- Plan thoroughly: Measure and sketch your layout before starting.
- Use quality materials: Strong bricks and stable base materials prevent future repairs.
- Work in sections: Lay small sections at a time to maintain consistency.
- Use proper tools: A plate compactor, level, and mallet make installation easier and faster.
- Maintain spacing: Even gaps filled with sand ensure a tight and durable patio.
- Consider help: Having one or two extra hands speeds up brick lifting and placement.
Conclusion
Installing a brick patio may seem like a big project, but with preparation and step-by-step guidance, it’s entirely doable. From DIY brick patio setups to professional-level finishes, following proper steps ensures a long-lasting and beautiful outdoor space.
For expert advice, materials, and tools to make your patio project smooth and fast, visit All Star Construction Group. Your dream brick patio is just a few steps away.
FAQs
1. Can I install a brick patio myself?
Yes, with proper planning and materials, a DIY brick patio is achievable for most homeowners.
2. How long does it take to install a brick patio?
Time depends on size and complexity. A small patio may take a weekend, while larger patios require several days.
3. Do I need special tools for installation?
Basic tools include a plate compactor, level, mallet, tape measure, and broom. A masonry saw helps for cutting-edge bricks.
4. Can I install a brick patio on any surface?
Yes, but you need to prepare a solid base of crushed stone and sand for stability.
5. How do I maintain a brick patio?
Regularly sweep, remove debris, refill sand in gaps, and inspect for uneven bricks.